
Here is a way to create a customized pattern for a breast cancer lapghan. The lapghan pattern features the breast cancer pink ribbon with the patient’s name. Simply open my free single-crochet lapghan pattern in the Grid Designer and add the patient’s name with the Grid Designer’s text tool! The finished graph can either be printed out or downloaded. You can even download written crochet directions for the lapghan with your custom name!
The steps are written here in this post, but you can also follow this YouTube video by clicking here.
What is Grid Designer?
The Grid Designer is a new, free, on-line tool for drawing and creating colored craft charts for your own patterns. Create your own designs for knitting, crochet graphgans, C2C crochet, latch hook, cross stitch and more, using the Grid Designer! Read more about the Grid Designer. Grid Designer does not require a login or email. It is my retirement project after 30 years as a software engineer and it is completely free to use. It runs in your browser. To see the kinds of things you can do with Grid Designer watch the overview playlist in youtube.
Step 1: Open the basic pattern
The basic pattern includes the pink ribbon background for the lapghan. It is intended for single-crochet with medium/worsted-weight yarn. It is 108 stitches wide by 142 rows tall. With a gauge of 13 rows and 12 stitches in a 4 inch square, it would be 36 x 44 inches when finished. You may want to put an edging of your own choosing around it, which would make is slightly larger.
To open the basic pattern, click this link. When the new page opens, click the “Load as Project” link in the lower right corner. (Here is a C2C version also, the text will not work as well because the pattern is smaller, but short names will work OK on this pattern: c2c version.)
The Grid Designer will open in a new window in your browser and a pop-up will be displayed asking if you want to load a shared pattern. Click the Load button.
The lapghan graph will open in the Grid Designer and the screen will look like this:

Step 2: Add the Name
Next, you need to add the patient’s name across the middle of the pattern. This will be done with the Text Tool located on the bottom toolbar, on the right side. The text tool button looks like this:  .
.
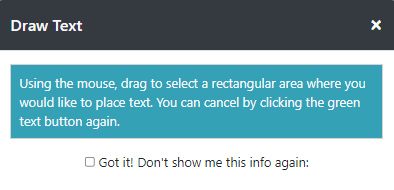
Click the text tool button. It will appear green  and if this is the first time you have used the text tool in the Grid Designer a pop-up will come up to tell you what to do next.
The pop-up says “Using the mouse, drag to select a rectangular area where you would like to place text. You can cancel by clicking the green text button again.”
So, with your mouse, press and hold the left mouse button down where you would like the corner of the text area to start, then continuing to hold the mouse button down drag the mouse across to where you would like the opposite corner of the text to be. You do not have to be exact at this point. You will be able to resize and move the text around in the next steps. You just need to get a starting rectangle that is generally in the area where you want the text to be. Below is the rectangle I drew. On the left, I am still dragging my mouse with the mouse button down. On the right, when I let up the mouse button, the sample text “ABC” is drawn and the buttons change on the bottom of the screen.
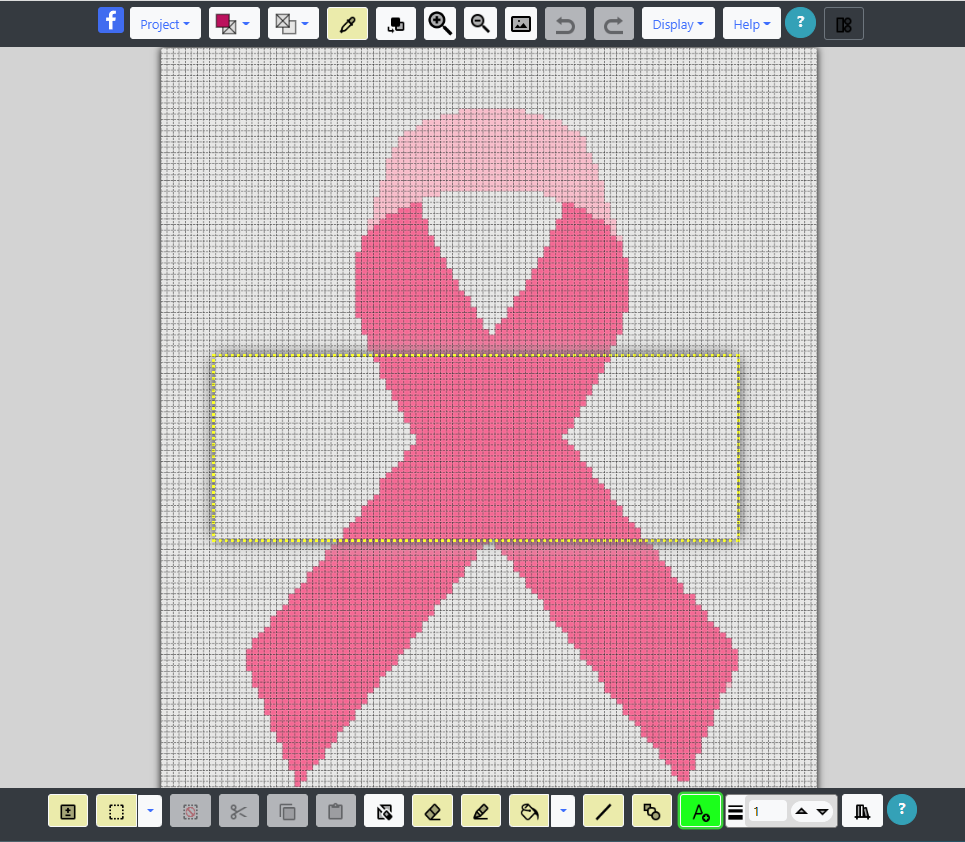
Now you are in the text area of the Grid Designer. The buttons on the bottom toolbar, now change information about the text. You can change the font, the height, the orientation and set Bold or Italic on the text, if the font allows it.
All these fonts are free google fonts. If you have a font you would like added to the Grid Designer, let me know. Send me an email by clicking on the contact tab at the top of this page! I can add any Google font to the Grid Designer. Click here to browse google fonts.
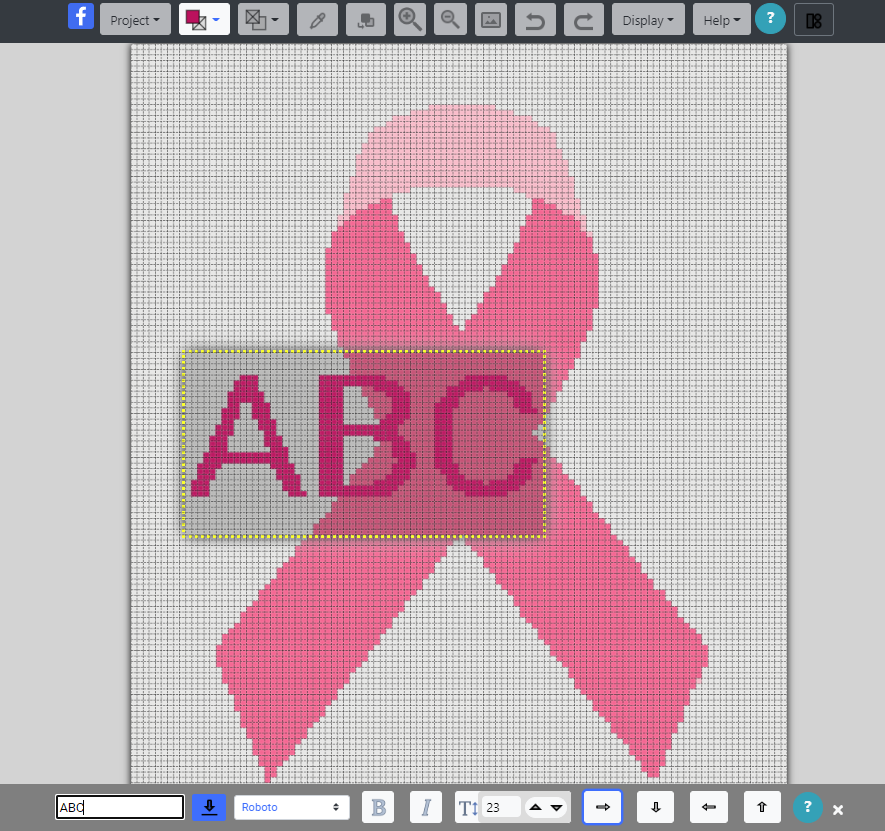
I type in the name Mary (lower left), select the Courgette font from the font dropdown on the bottom toolbar and select the Pink color from the foreground color list.
The height is set originally by using the rectangle you drew at the beginning. You can change the height up or down to modify the size of the text on the pattern.
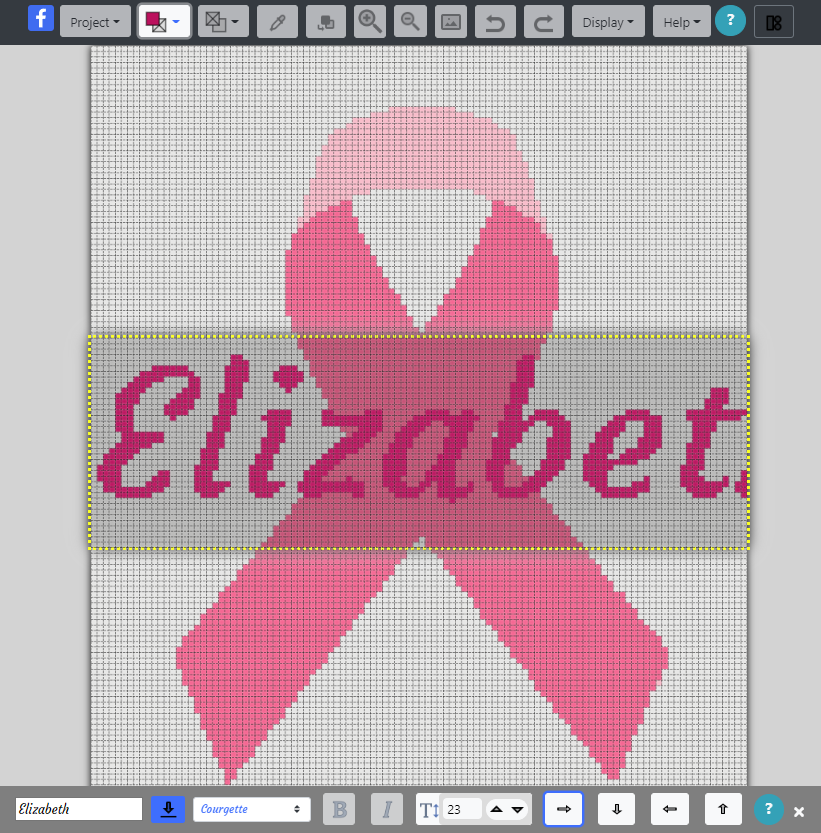
In the picture on the right or below, my text height is 23, which works well for the name Mary, which is short. But, suppose the name is Elizabeth instead?
To fit a longer name in, the height will have to be reduced until the name fits.
Let’s take a look at what we need to do to make Elizabeth work on our lapghan pattern.
First, type the name Elizabeth into the text box on the bottom left. You will see Elizabeth written across the pattern, but most likely it will not fit for you. See the picture below on the left, where the name is cut off.
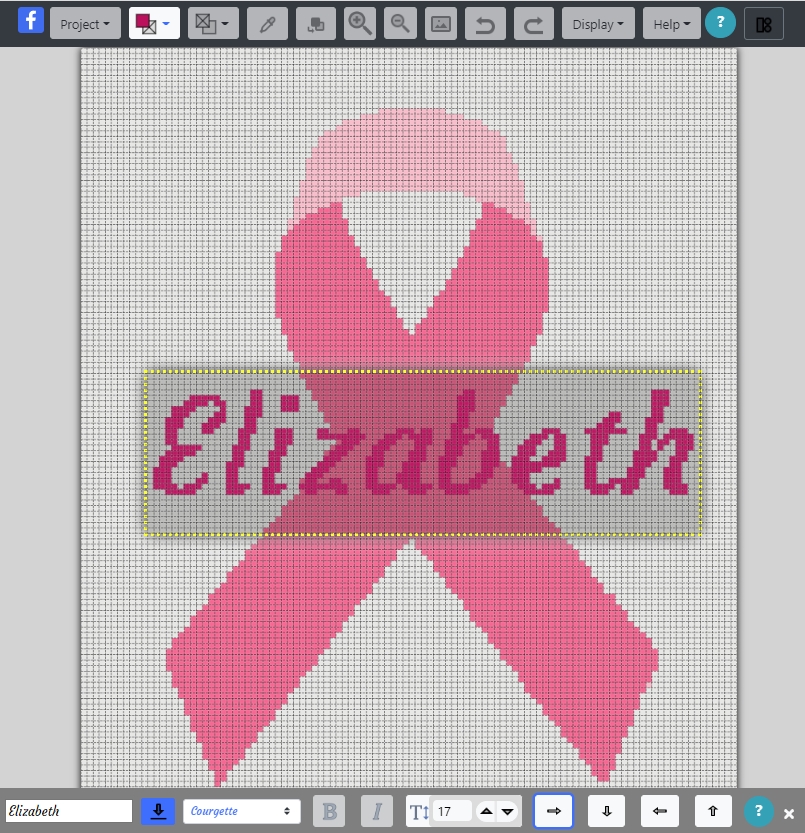
I can fix this problem by reducing the text height. Reducing it from 23 to 17 makes the text small enough to fit on the pattern. See the pictures above. The text height is in the center of the bottom toolbar. Click the up and down arrows to change the height value or type a value in the box.
Now I have Elizabeth fitting on my pattern.
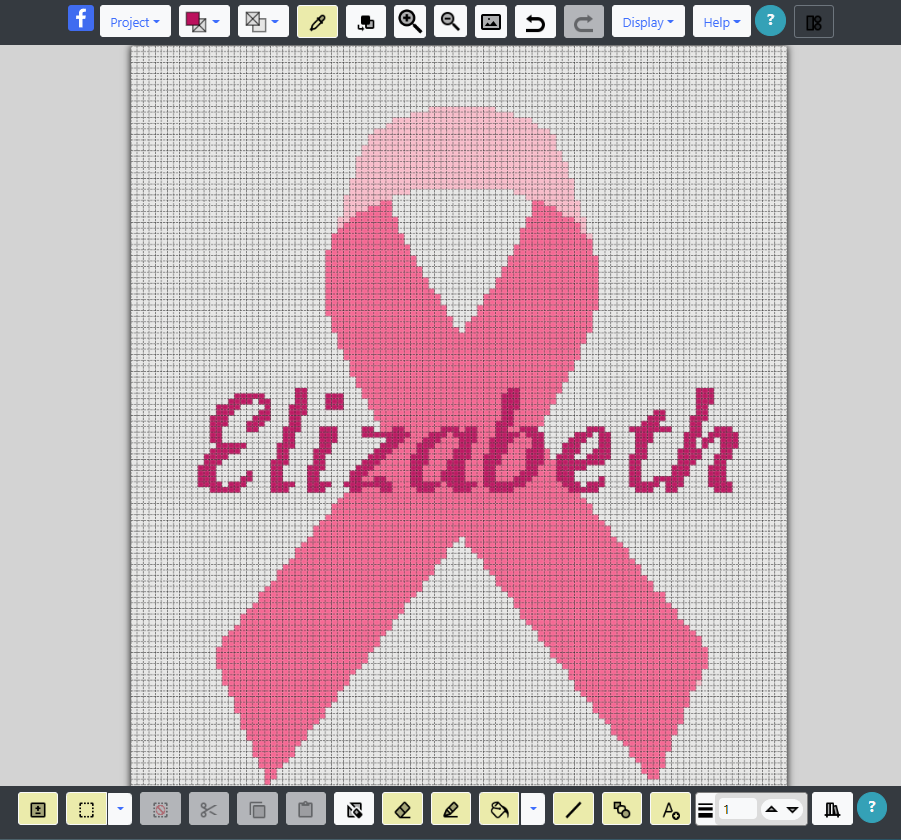
Position the text where you want it by grabbing the text rectangle with the mouse and dragging it. When you have it where you want it, click the blue Apply button on the bottom toolbar. This will draw the text onto the pattern.
Once you apply the text, the bottom buttons will be updated to show the main Grid Designer toolbar once again.
To exit from the text area without updating the pattern, click the X close box on the far right of the bottom toolbar.
Step 3: Save the Pattern
In the upper left of the Grid Designer screen is a Project pull-down menu. Select the Project menu and click the Save option in the menu.
A pop-up will come up asking for the name of the pattern. Enter the name and click the Save button.
Your project is now saved in your browser storage. To reopen it later, select Project -> Open and select the pattern from your project list, click Open.
To save your project to a file on your machine, use the Project -> Export option. This will save a permanent copy on your machine in the event that you or someone else might clear the browser’s website data.
Step 4: Print or Download the Pattern
If you are used to reading the colored graph, you may want to print the pattern. To print from the Grid Designer select the Project -> Print option and follow directions. More information on printing options can be found in the Print and Download video on YouTube.
You can also download the graph with the Project -> Download option. From Project -> Download you can download an image of the graph, an image of the graph’s color key, or a PDF file that contains both the graph and the color key. The PDF file can also contain written crochet directions in SC, HDC or C2C, as well as estimates for the amount of yarn needed. The instructions for this lapghan should be written in SC.
To get the written instructions for SC:
- Select Project -> Download
- When the screen has updated, select PDF
- Select the written instructions checkbox and the SC option when prompted.
- Click download.
Depending upon your browser settings and the device you are using, the PDF file may be downloaded to your machine or opened in the browser. If opened in the browser, there should be a download button available to download the file.
PDF files from the Grid Designer are suitable for use in an app like KnitCompanion. In KnitCompanion you can open the PDF file and set crosshairs to your current working position for easily following a graph or written pattern.
More Info
See the Overview playlist on youTube for more information on the Grid Designer.
If you are ready to start the Grid Designer to create your own project, click here.
As always, if you have any questions or comments, leave me a message below or go to my contact page to email me.