
The grid designer is a new, free, on-line tool for knitters, crocheters, cross-stitchers, latch-hookers, quilters, and any other crafters who require the use of a grid-based editor that allows the user to draw with color to create a colorful digitized chart, picture or diagram.
Get started quickly with the YouTube Overview playlist or continue reading for more information.
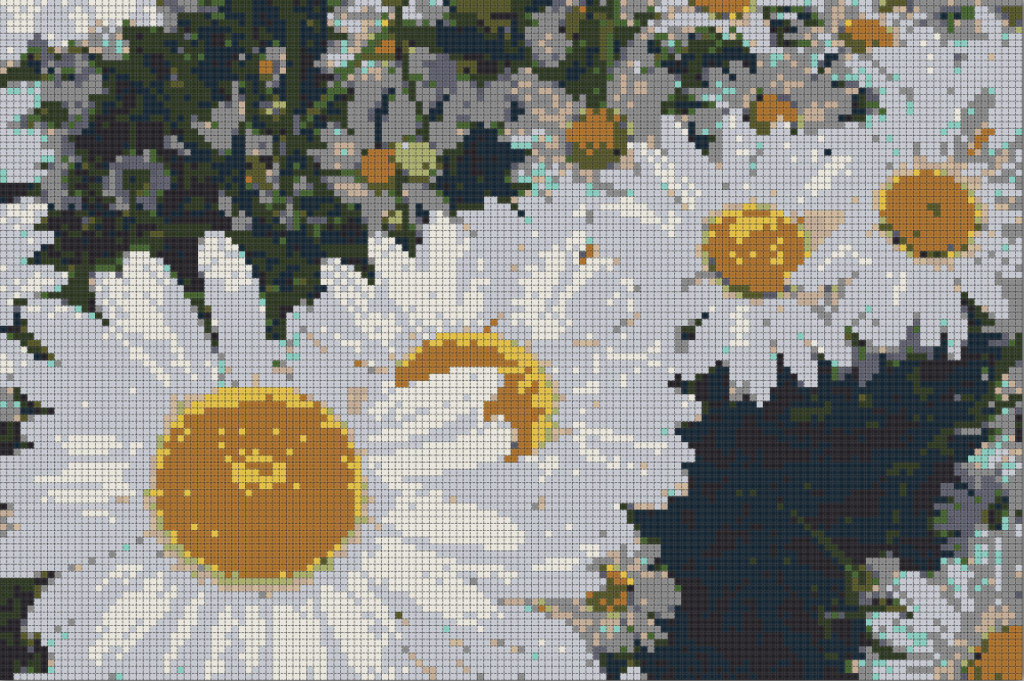
Create projects either with a blank canvas, or start by creating a project from an Image or favorite photo!
Select a color palette or create your own colors to work with, then use the drawing tools to edit the grid and create beautiful designs.
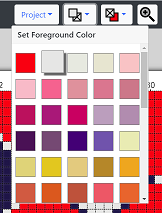
Select the drawing (foreground) color and background color from dropdowns that will give you a choice of any color in the current palette.
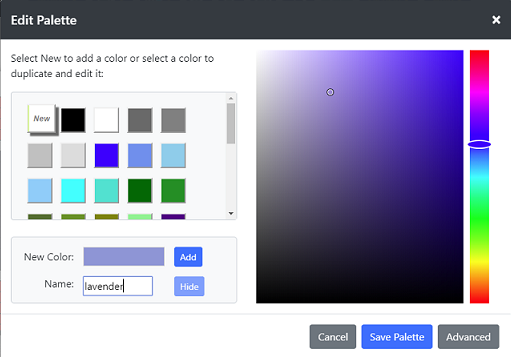
Many predefined color palettes are available. You can also create and add your own custom colors to any palette.
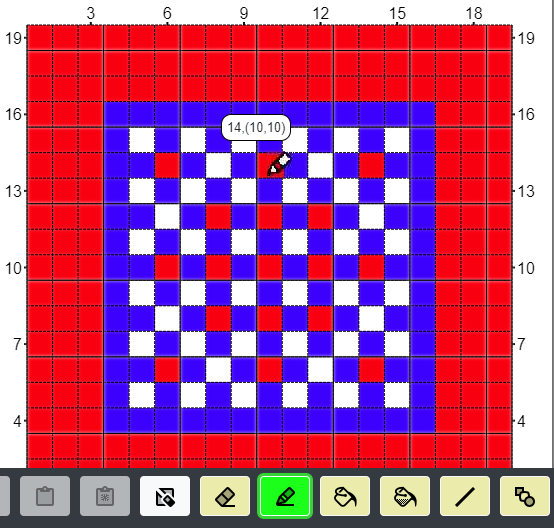
The drawing tools include:
- Pencil for free-form drawing
- Eraser
- Line tool
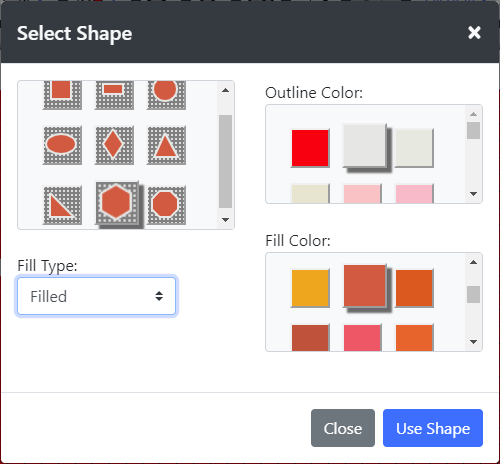
- Shape tool to draw simple shapes, filled, outlined or solid
- Fill and Outline tools to fill and outline areas
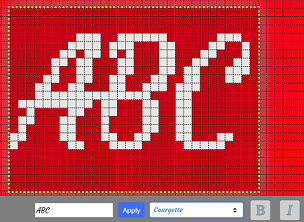
- Text tool to create text on the grid in your selected font

The shape tool allows you to create simple shapes, such as rectangles, ellipses, diamonds, triangles, etc.
The text tools allow you to create digitized text from a wide selection of fonts. Text can also be rotated in 90 degree increments.
Select sections of your drawing to cut, copy and paste into other areas of your drawing. The paste tool has an auto-move capability, to help in creating pattern repetitions for borders, etc.
The paste tool also allows you to:
- Flip the selection vertically and horizontally
- Rotate the selection in 45 degree increments
- Invert colors in the selection
- Enlarge and shrink the selection
- Resize the selection

Display options allow you to hide/show grid lines, draw bold rule lines at specified intervals, show the position of the mouse while editing, etc. You can also zoom in/out, and zoom to show the complete picture, then quickly zoom back to where you were working. This is particularly useful with a large grid, when you want to check the overall appearance of the design and then quickly return to your original place to continue editing.
When you are done with your design, you can save it to your browser’s local storage, without any login. Retrieve your design at a later time (using the same browser) and continue your work.
You can print your design from the browser, or download it to a png file that you can print.
Share your design with others on your favorite social media site!
For a quick demo of how to use the Grid Designer drawing tools, see my YouTube Drawing Tools video or watch my Overview Playlist Series.
Continue reading with part 1 of my post on drawing tools by clicking here.
Looks Nice!
Thanks!
I found this while searching on making a latch hook for my granddaughter for christmas. I have run into a issue that I can’t seem to find how to fix. I finished with the image that I wanted to make. I saved the project but then started thinking that I wanted to make it smaller. I can’t seem to find a way to do that without messing up the existing design. I tried to do a new project and use the old saved picture but for some reason it wont pull up or let me save. When I click save it disappears. Does this make sense? I just want to make my project smaller in size.
Hi Diane, Right now the only way to make something smaller is to use the paste area buttons. I am currently working on a simpler way to do that which should be available in a couple of weeks.
The way to do it with the paste buttons is to:
1) Select the “select all” option from the selection popup on the bottom toolbar. This will select the entire project.
2) Click the cut button on the bottom toolbar, this will clear the grid and put a copy of the selection in the paste buffer.
3) Click the paste button on the bottom toolbar, this will make a floating paste item of your picture.
4) The buttons on the bottom will change and you should select the custom change button (has twisted arrows on the button).
5) Select the Resize radio button and enter the number of rows and columns you want the picture to be.
6) Click the Apply button and it will resize. Resize can lose data, no matter how it’s done, you may have to edit a bit after you resize.
7) Click the blue apply button on the bottom and it will paste back onto your grid.
8) You then have to remove the extra rows and columns. You can do this with the Add/Delete Rows and Columns button on the bottom left.
This will be quite a lot easier when I get the newest changes out. You will be able to resize a picture, both enlarge and shrink by just typing in the rows and columns in one place and it will resize the whole thing for you, including removing extra rows and columns, etc.
There is now an easy way to enlarge and reduce the size of a picture. See this video on youTube for information: https://www.youtube.com/watch?v=wCG8cFyI8YY. Basically, it can now be done through the Display > Grid Size option.
When clicking on the substitute colors icon to hover over each color, is there any way to enlarge that screen as it appears very small. I’m working on my laptop with approximately a 17″ screen.
There is not currently a way to enlarge that picture. I will have to think about how that might be done.
For now, if I want to view the larger picture I usually apply the change and look at the larger picture in the main editor. Then, I can undo the changes if I don’t like them and go back in.
I will think of ways to change the UI so you can view a larger picture while you are substituting. I could just make the entire dialog larger. It’s a fairly small dialog right now.
Sounds great. I really like this program, my 1st project seems to be coming out well. Thank you so much!
Hi Kathy, Thanks so much for the comment! Just so you know, I have been playing with the dialog today, in my test system, this is not out on freese-works yet. But, what I have is a larger dialog and buttons to enlarge and reduce the picture. It’s working pretty well, but I will do more testing before I release it. Should be available to you in a week or so.
Just a quick update, this feature was released and is in the current Grid Designer. So, when you do color substitution, you can make the small picture at the top larger or smaller. I also added a tooltip that shows the color when your mouse is over the picture.
I have quite a few patterns I created today, 5/8/23. I didnt do anything else all day just Grid Designer. I used Grid Designer and free images mostly from vectorstock.com. send me your email address and I’ll send them to you. I hope it’s OK I have shared 1 on Facebook and I’m telling every one about the program. I’m not a professional official designer. I would be hsppy help/assist anyone to learn how to use it. I did have some questions but I can’t remember them at this time.
I’m Bonnie Littlecat from facebook.
Hi Bonnie, I am absolutely thrilled that you are using the Grid Designer! Would love to see the patterns you created.
Have you used the Project > Share option to create a link to the patterns?
That would be the easiest way to share them on facebook or with me.
You can contact me in a variety of ways, you can message me on facebook, leave comments here, or click on the Contact link at the top of this web page. That will bring up my contact form and will send me an email with your email address, then we can correspond in email. The contact form protects my email address from web bots and crawlers that search web pages for email addresses to sell.
You should be able to copy and paste the link generated from the Project > Share option anywhere, like in facebook or in and email. If you send the links to me I can see the project you generated.
One other quick note for others that may be looking for free images to digitize into patterns. I use the free photos and images on pixabay.com quite a bit. If anyone has other places where they have gotten free images, please feel free to share the links to places you have been here in a comment.
It appears that vectorstock.com has free images that can be used for personal use. A broader license is the CC0 (Creative Commons 0 license), which allow use of images for commercial use also.
Searching for CC0 or public domain images, vectors, etc appears to be a good way to look for images like this. Here are some sites I ran across with free images in the public domain or CC0 license:
https://unsplash.com/images/stock/public-domain
httpx://pixabay.com
https://www.pexels.com/public-domain-images/
https://free-images.com/
https://publicdomainvectors.org/
https://www.freepik.com/free-photos-vectors/public-domain
https://freesvg.org/public-domain-vector-icon
https://www.vecteezy.com/free-vector/public-domain
Here is the official definition of the CC0 license: https://creativecommons.org/share-your-work/public-domain/cc0/
Are we able to upload our own drawing and use this to color plan it?
You would have to take a photo of the drawing and then you can digitize it using the Project > Create from Image option. Here is an example in this video on youtube where I take a line drawing, digitize it into the Grid Designer and then color it in using Grid Designer drawing tools: https://www.youtube.com/watch?v=zzgD6JkK_vU. Here is another one from a free drawing on pixabay, but you can always take a picture of your own artwork: https://youtu.be/fPjJBxvdCRM
Good day Ms. Freese, I’ve been trying to put together photos of latch hook rugs and other photos I have on your Grid Designer; first such a wonderful thing you have it for free…I hope in some way your getting kick backs when we use your grid!
I have low vision and having a hard time reading your screens are very blurry is there any way to sharpen the words on the pages? I have a wonderful drawing of Jesus I would love to put that on a latch hook rug for friends but the grid & writings are not clear and I’m having a hard time; any suggestions? I run a tower PC and a good sized monitor. Windows 10. Thank you for your time today.
Hi Ada,
Thanks for using the Grid Designer!
Sorry this is not working for you right now. 🙁
If the text that you are having difficulty reading is part of the browser, such as directions on a page or documentation, then it might help to reduce the Display Resolution on your machine or increase the text size in your browser.
Reducing the Display resolution will make the text larger in everything on your machine. To change the resolution, you right-click on the background of your desktop (not inside a window) and a menu will come up. Pick Display setting from the menu and the Setting app will come up. Scroll down till you see “Display resolution”. Select a smaller size from the dropdown menu there. For instance, mine is currently set to 1920 x 1200, then to make the text larger on my screen, I can select something smaller like 1440 x 900. That will make all text larger.
Another thing that could be helpful is to change the text size in the browser. This is something that can be changed in the browser settings. For Google Chrome, you click on the three dots on the upper right of the browser window. That brings up a menu. Select settings from the menu. Then when the settings page comes up, select Appearance. Look for Font Size and set it to Large or Very Large. That should help with reading the text. Other browsers will have a similar setting for Font size somewhere in their settings.
Then, you might be referring also to text that is digitized from a picture. The edges of text often come out blurry as the pixels in the original picture next to sharp edges are generally not sharp. To make things like text in a jpg look nice and smooth, there are actually pixels at the edges of something like text that are between the text color and the background color. So if you had white text on a black background, there would actually be several shades of gray around the white text, which makes the picture look better to your eye, but doesn’t help when digitizing something.
One thing you can do to help with text is to reduce the number of colors being used when you digitize. This should go a long way to removing the blur on the text, however, if the rest of your picture has lots of colors in it, then it can be difficult to do this. So, if you had just white text on black, you could set the number of colors to 2 and you would get sharp text. But, if the picture contains a colorful background or other colors that are needed, then some of those colors will show up around the text.
I have digitized many pictures for other people with text in them, and most of the time I end up editing the text after I get it out of the digitizer to clear it up. I should make a video on that, because there are lots of ways to use the selection tools to select text and then use the color substitution tool to make it clear. So if you had white text on a black background, but you had a lot of colors in the picture and they were showing up on the edges of the text, you can use the selection tool that selects multi-color motifs to select a letter, then do the substitution tool to substitute white or black for each extraneous color. It would be a good video for me to do I think. It is hard to explain entirely here.
If you would like, you can pass me the picture you would like to have digitized to a latch hook rug, and I can work on it for you. I would need to know what type of canvas you want it to be on, such as 3.75 holes/inch or 5 holes/inch, etc. Then, I also need the size in inches you would like the rug to be.
I would love to help you out. I have done lots of pictures for others when they are having difficulties. I enjoy helping out and it helps me learn more about best practices with the digitizer.
Let me know if you would like me to give it a try.
Oh, by the way, there is a new option in the Project > Download area that will allow you to write out text with colors for each line of a chart. This way, you can look at the text, rather than the chart, which might be small and difficult to follow.
That option is shown in the newest video here: https://youtu.be/blPMvsVwx90
Thanks for your interest in the Grid Designer!
Let me know if you have more questions or would like me to take a look at your picture for you.
I have also sent you an email with this information in it. To send me a picture, you can just send it back with the email or if you are on facebook, you can message the picture to me there.
Agnes Freese
Have a great day!
can u make symbols like for example the &, or quetation marks and also u make grid patterns to do the knitting machine because i have the addi king size 46 needle knitting machine and would love to start making these wonderful designs thank you and have a blessed day.
You should be able to do symbols by typing them into the text tool. I just tried it out, though, and there is a bug there! The symbol is showing up as an escape-sequence of letters used to pass these special symbols around on the internet. So the quotation mark is coming out as “& q u o t ;”, which is a special escaped value for the quotation mark. I will fix this in the next release, which should be out in a couple of weeks or so! Thank you for your question, as it made me look in the right place!
I have a couple of older brother and passap knitting machines. They are flatbed machines with electronics and I hope at some point to interface to them, but would need information on how to pass the pattern to the electronics before I can do that.
I looked on-line and found some videos on the Addi king knitting machines. They look incredibly useful and very simple to operate! Wow! I might get one myself.
Grid designer is primarily a color chart editor and it looks like these knitting machines will allow you to manually knit a fair isle pattern where you manually switch two colors back and forth. Since it would be a manual process, I think the printed chart from Grid Designer would work as a chart to follow as you are working on the Addi machine. It would be important, if you ae knitting a circular pattern, to make sure that your pattern repeats every 46 stitches or has a gap at the right place in the pattern so that the repeat can be adjusted around the gap. But, I think a color fair isle pattern could be used for the Addi machine. You would want to make sure that there are not more than maybe 4 stitches where you are floating one color over another, so your floats don’t get too big.
It doesn’t look to me that you can really knit intarsia with one of these machines, but one thing you can do is to duplicate stitch a pattern over the knitting. I do a lot of duplicate stitching of patterns myself as I prefer the way it looks afterwards and I have never gotten the hang of knitting intarsia very well. So, for instance, if you knit a hat and you want a snowflake pattern on the front, you could create that snowflake pattern with the Grid Designer and duplicate stitch it on the front of the hat after taking it off the machine. That would be one way to do that with machine knitting.
Given all of that, are there other things you would like Grid Designer to do, that would help with crating a pattern for the Addi King knitting machine? For instance, Grid Designer could warn you about the length of floats, or perhaps check if a pattern is repeating and suitable for circular knitting. Would those things be useful to you? Are there other things you might have in mind that might be helpful? Please let me know what your thoughts are. You can leave a message here, or you can also send me an email by clicking on the contact tab at the top of the page and filling out my contact form.
I would like to say how simple and amazingthe software is for an absolute beginner like me! I’m having a blast converting pics into C2C graphs and row by row patterns.
I’ve started my first ever C2C project which I begun from the graph only – I am left handed and am struggling to work out how to get the pattern instructions to print from bottom left corner.
I can’t wait to make more projects and let everyone know about the software 😀 xxx
I think there may be some options to get it to print in that order, let me take a look.
It looks like I need to add that option to the regular SC and HDC directions. However, for now, there is a general option that will write out how many squares are a given color starting from left to right. To got to this, select Project > Download. Select any options you want for the graph, then select PDF. Then, you can turn on written instructions and pick the bottom option ” Alternate L2R – List colors for each row (bottom to top), first row from left to right, next row from right to left, etc.”. That will list the colors starting in the bottom left and then going back and forth across the rows as for SC or HDC.
Hope that is helpful for now. I’ll add the left-to-right option in the next month to the SC and HDC directions.
Thank you so much 😀 Is that the same for the corner 2 corner directions selecting the alternae l2r please xx
I’ll take a look at adding options to C2C also.