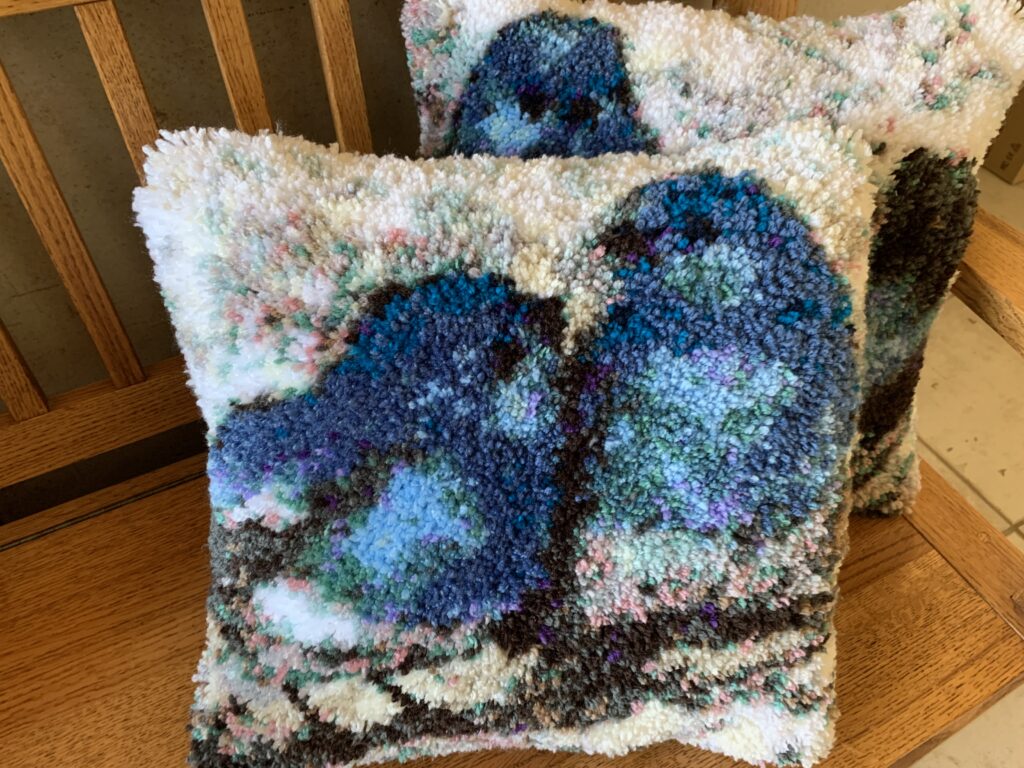
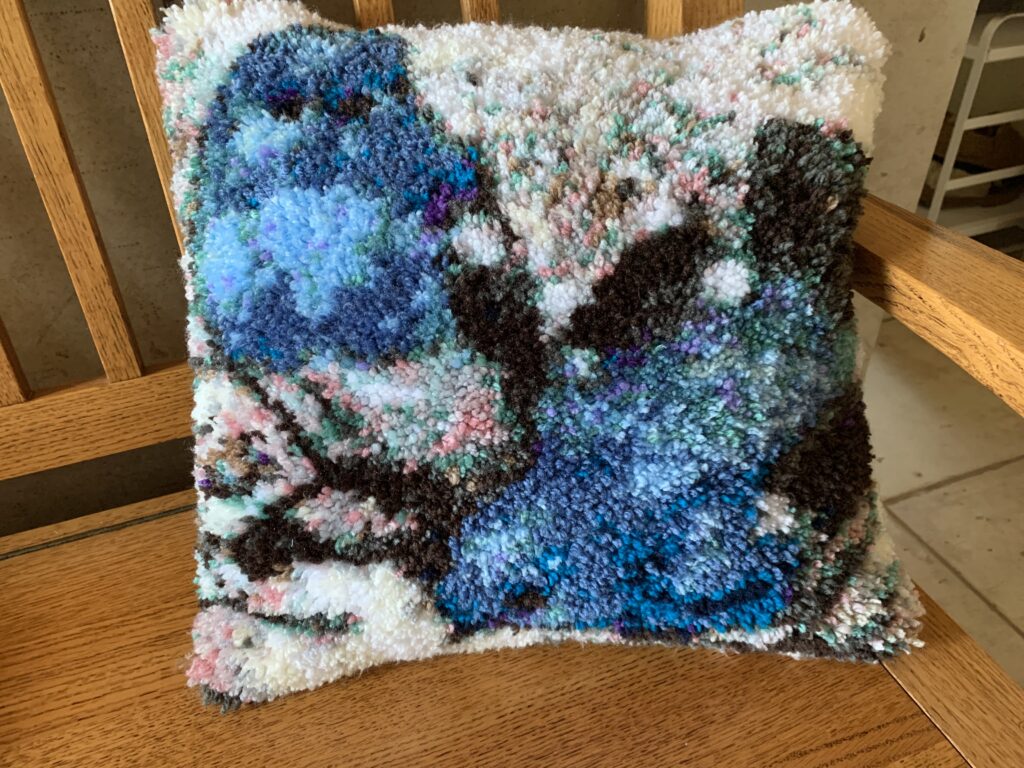
Make these two bluebird latch hook pillows for your home! This post contains free patterns for each pillow AND a bonus pattern at the end for a large matching rug.

How the patterns were made
The patterns for each of these pillows were digitized with the Grid Designer from an image on pixabay provided by user Vinsky2002.
The Grid Designer is a free drawing tool that runs in your browser. No login required, all features are free, and there are no ads!! Grid Designer is my retirement project after 30 years as a software developer. I am both its developer and user. If you would like to know about Grid Designer, check out the freese-works.com home page. If you would like to digitize your own picture, here is a link to a youtube video about digitizing in the Grid Designer: Create a Project from an Image in the Grid Designer.
Image Used for Patterns
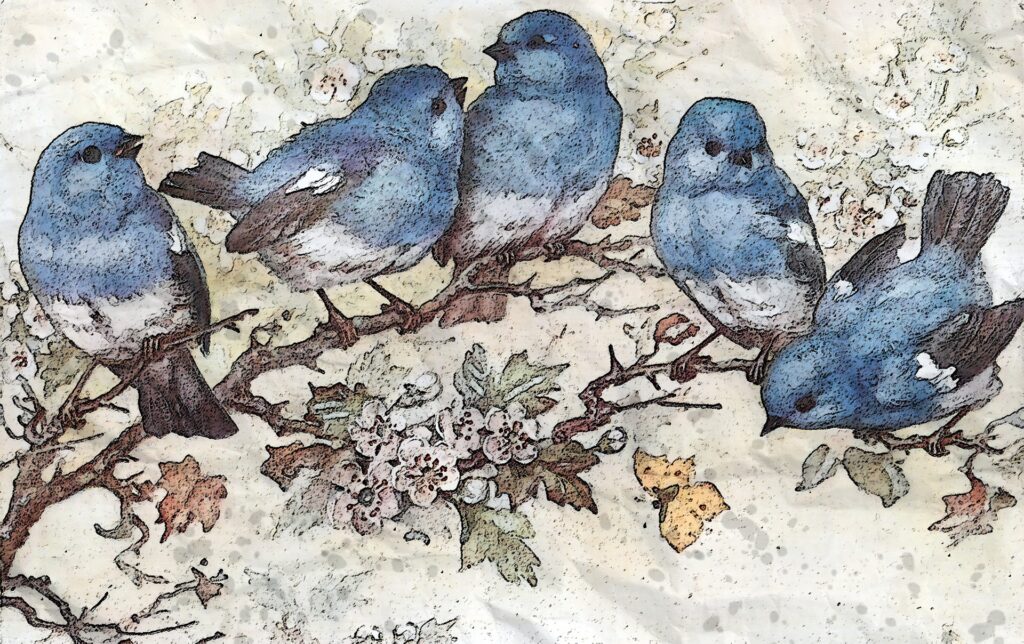
This is the original image I used for digitizing in the Grid Designer.
Here is the link to that image on pixabay: https://pixabay.com/illustrations/blue-birds-and-blossom-wild-bird-4301366/. This image was provided free for any use.
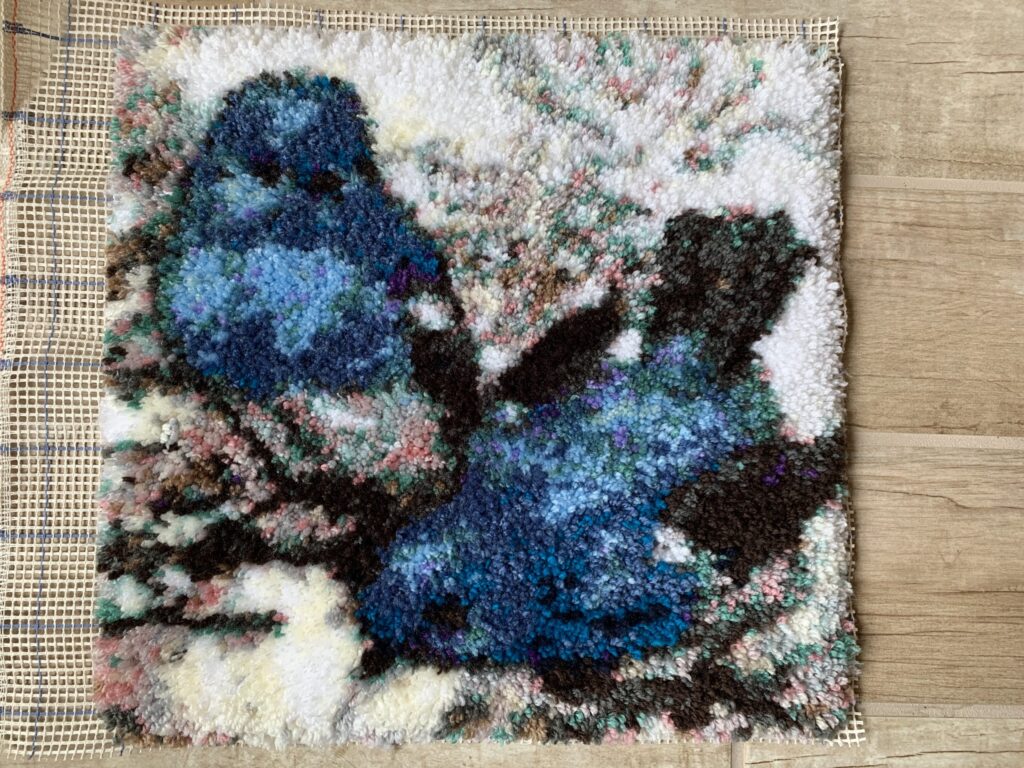
The pillows were created from the two pairs of birds on the right side of the image.
The Latch Hook Patterns
Click this link for the pattern for pillow 1.
Click this link for the pattern for pillow 2.
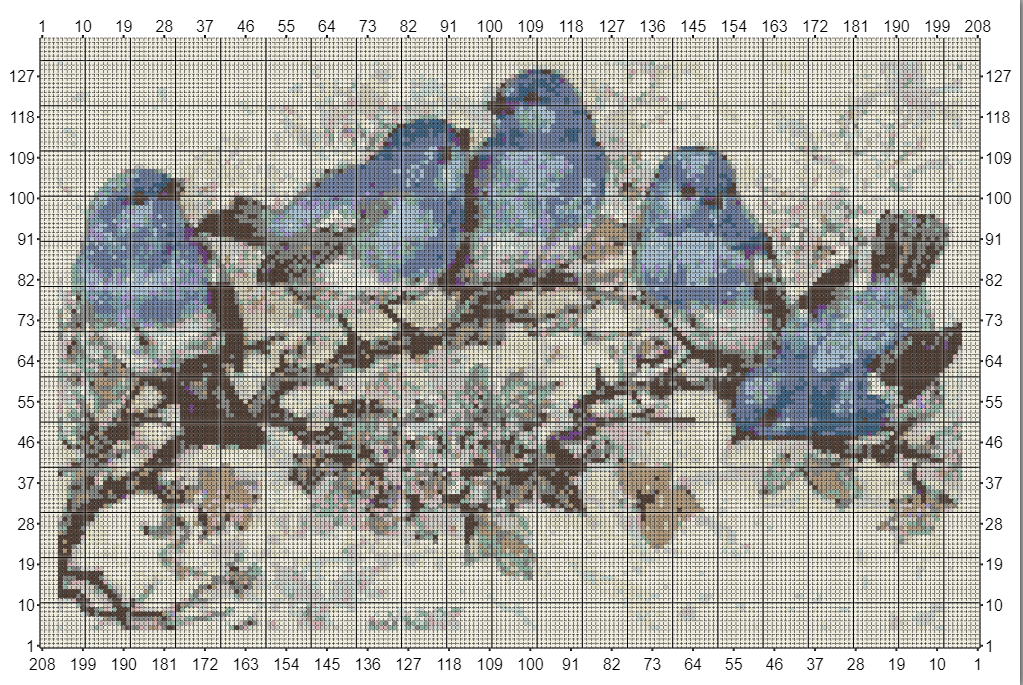
After clicking either of the links above a new page will open with a simple picture of the pattern. Four links will be available under the picture:
- Pattern – opens an image of the pattern graph
- Pattern key – opens an image of the pattern color key
- Pattern PDF – opens a PDF with both the graph and color key which can be printed.
- Load as Project – loads the graph into Grid Designer for editing, printing, etc. (Consider that you can load the graph into Grid Designer and modify the colors of the birds or edit it in any way you wish by clicking the Load as Project link).
Materials
Here are the materials needed for creating the two pillows as pictured above:
- Latch hook canvas at 5 holes/inch (also referred to as 5 mesh). Each pillow top is 80 x 80 holes, for a size of 16 x16 inches. You need a little more than that for an edge that you can sew to the back of the pillow. So, 90 x 90 holes would work. I ordered one piece of latch hook canvas from Tracy’s Craft Shop at 100x70cm, that I was able to cut in half and use for both pillows. It was the perfect size for the project. Here is a link to what I purchased. This canvas is excellent quality. Be careful what you purchase, see my post here on 5 holes/inch canvas. This post also contains a link to purchasing good quality canvas in the U.S.
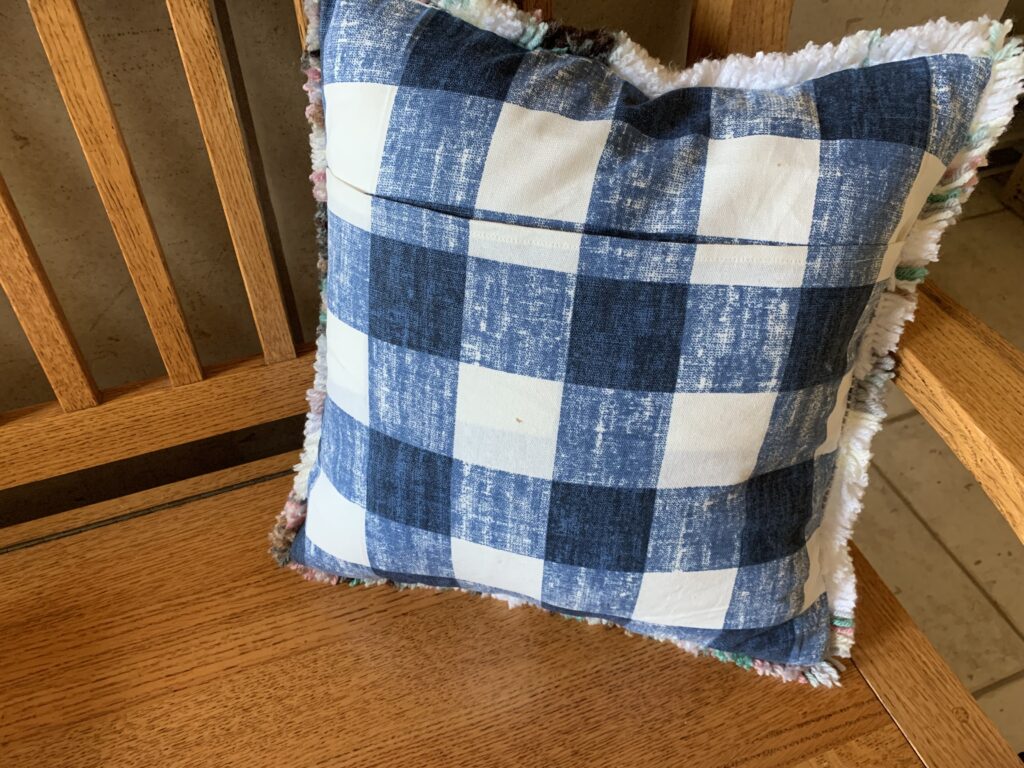
- 1 yard Lightweight canvas cloth for the back. I used a patterned cloth as the fabric store I went to did not have a solid color I wanted in the fabric I wanted on the day that I went. I’m not sure I really am happy with the patterned back and now think I should have held out for a solid color. Probably a plain white would have been better.
- 2 16 inch square pre-filled pillow inserts.
- Sewing machine and thread.
- Latch hook 5 mesh tool. Also available at Tracy’s craft shop or Color crazy. You can use a larger tool if the canvas is very sturdy, but I recommend a smaller tool made for 5 holes/inch canvas. Be careful where you purchase the tool, they are not all created equally. Again see my post on canvas tools here.
- Pre-cut latch hook yarn. This project uses latch hook yarn from Ramszi Nini in the UK. Her ebay shop is located here: https://www.ebay.co.uk/itm/112643827438?mkevt=1&mkcid=16&mkrid=710-127635-2958-0. You will need the 65 mm length (which is about 2.5 inches). This yarn comes in packs of 400 strands each. For both pillows you would need:
- 5 packs white
- 4 packs of denim
- 4 packs of graphite
- 3 packs of cream
- 4 packs of dark brown
- 3 packs of sage
- 3 packs of silver
- 2 packs of parchment
- 2 packs of cloud blue
- 2 packs of mushroom
- 2 packs of duck egg
- 2 packs of storm blue
- 1 pack each of mocha, empire, pale rose, lavender, proper purple, and midnight
To work either pillow 1 or pillow 2 alone: 3 packs white, 2 packs each of denim, graphite, cream, dark brown, sage, and silver. 1 pack each of parchment, cloud blue, mushroom, duck egg, storm blue, mocha, empire, pale rose, lavender, proper purple and midnight.
The rich choice of blues that Ramszi provides in her color palette are amazing and I recommend this yarn for working these patterns. This yarn is also amazingly soft; it was a pleasure to work with!! However, if you want to use a different yarn, such as Herrschner’s, I can convert the patterns for that yarn. The choice of blues is not as good (IMHO) for Herrschner’s yarn, but I have looked at the conversion to it and it would also be workable. Contact me with a comment below or send me an email through my contact page from the contact link at the top of this post and I can send you the pattern links for the pattern converted to Herrschner’s yarn.
Work the Latch Hook Patterns
Print out the Latch Hook Pattern using whatever method suits you best. For my work, I just opened the pattern with the Load as Project link (described above) and then selected Project -> Print from the Grid Designer menu.
You can also open the Pattern PDF (described above), print it or load it into an app such as Knitcompanion. Knitcompanion will allow you to set crosshairs at your working position and zoom into the pattern image in the PDF. If you prefer to work from a digital device, this is the way to go. It is made for knitting, but I have used it with my PDFs for latch hook also.
If you have not latch-hooked before, I recommend a YouTube video to get started. Here is one that I like from Utterly Hooked Designs.
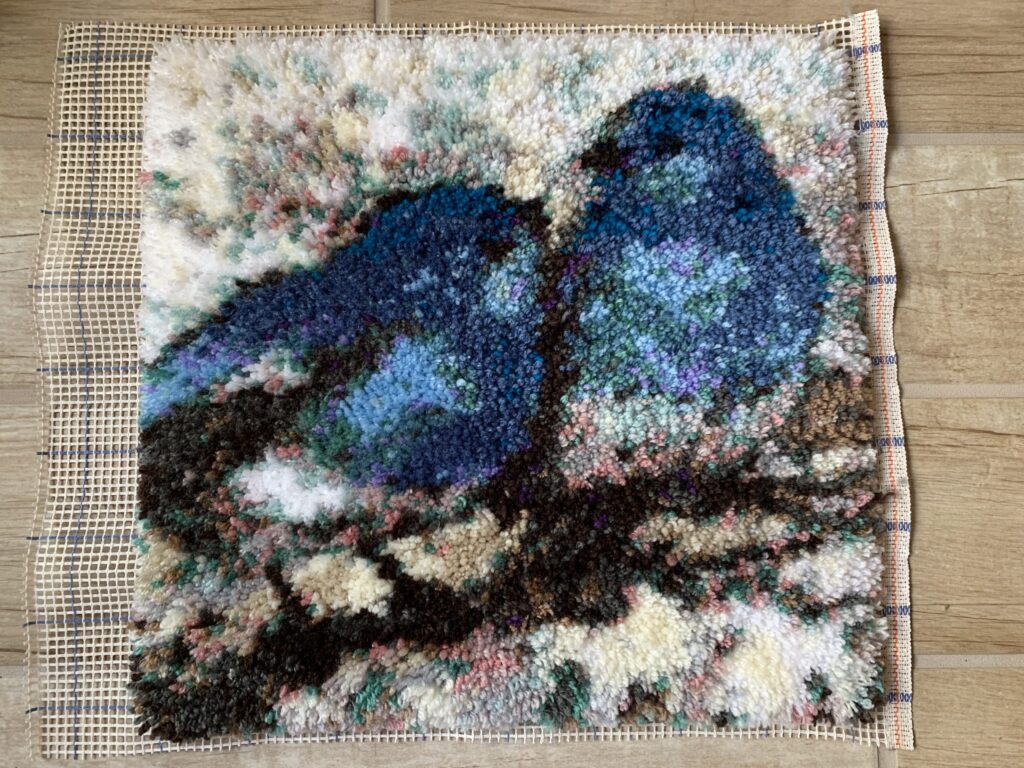
The patterns are 80×80 holes. Work them on your latch hook canvas being sure to leave at least 4-5 holes free around the pattern you are working. You will need this to stitch the pillow to the back fabric.
Attach Pillow Back
For creating and attaching the pillow back(s), I followed this video from Utterly Hooked Designs: Latch Hook Cushion/Pillow Tutorial.
This video shows you how to create a pillow back with an opening where you can insert your pillow forms easily. It suggests cutting two pieces for each back, each about 3/4 of the width of the pillow. For these pillows I cut two rectangles of fabric 14 x 18 inches each. For both pillows you will need 4 pieces total, each one 14 x 18 inches.
Make a hem on one 18 inch side for each piece as shown in the video. Then baste two pieces together with the hemmed edges overlapping each other and the pieces pulled apart wide enough to cover the worked pillow top area plus an inch on each side.
Sew the right side of your basted piece to the right side of the pillow top, being careful to go slowly and tuck the rug yarn in as you go. See the video. I used a zig zag stitch as directed. I set the width to 3 on my machine (max width of 5) for the zig zag and that worked well.
Trim the edges a bit as shown in the video, I also cut the corners diagonally to within about a 1/4 inch of the sewn corner, to make them easier to turn.
Turn the pillow cover right-side out and insert the pillow form. You are done!!
Bonus Rug Pattern
For those that are interested in going all in on the bluebird design. Here is a rug pattern that can be made from the same yarn available at Ramszi’s Ebay shop.
I suggest that you work this on a canvas with larger hole spacing. Something like 4 holes/inch or 3.75 holes/inch would work. The yarn is very full and soft, working it on 5 holes/inch canvas works well for the pillows as they curve outward and the yarn fills in very nicely. But, on a flat rug, I would suggest fewer holes per inch so the rug will lay flat very nicely. I have created the pattern using 4 holes/inch as the gauge. This will create a rug that is 52 x 34 inches. A very nice area sized rug!
Here is the pattern: Bluebird Rug.
More Info
See the Overview playlist on youTube for more information on the Grid Designer.
If you are ready to start the Grid Designer to create your own project, click here.
As always, if you have any questions or comments, leave me a message below or go to my contact page to email me.