The Grid Designer can be used for multiple crafts. You can create a project for latch hook, cross stitch, knitting, crochet, C2C crochet, etc. This post will show you how to create a project for a specific craft.
If you prefer to watch a video, see the video: Overview – Project Creation in the Grid Designer. This post covers the same content as the video.
More information is also available in the Grid Designer documentation. Click here to open the documentation.
If you would like to try out the directions for creating a project as you read this post, you can open the Grid Designer in another browser window by clicking here.
How To Create a Project
First, we will look at the general steps for creating a simple project for a specific craft. Then, we will go through the specific information needed for each craft and finally we will discuss how to calculate rows and columns.
Basic Steps
Here are the basic steps:
Step 1:
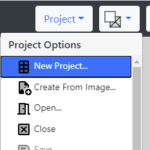
Select New Project from the Project menu. The Project menu is located on the left side of the Grid Designer’s top toolbar. The New Project Layout dialog will appear.
Step 2:
In the New Project Layout dialog there are 4 areas to fill in.
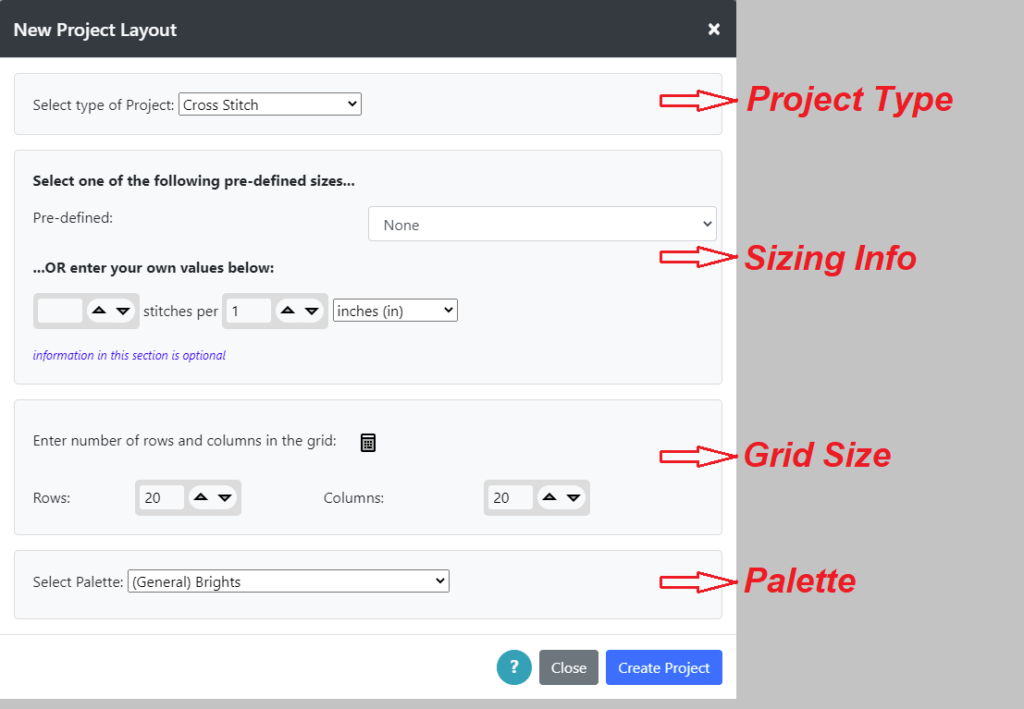
- Project Type – select your project type from the dropdown at the top of the dialog. If your project type is not there, you can select “Grid of Square Cells” or “Grid of Rectangular Cells” to work on a generic grid.
- Sizing Info – the contents of this section change depending upon the project type selected. Usually there are some pre-defined options and a way to enter your own information. The sizing info is optional in some cases, but is needed if you want to be able to convert between the grid size and real world inches or cms in Grid Designer.
- Grid Size – The number of rows and columns you want in your grid. If the sizing info is given, you can press the calculator button to calculate the number of rows and columns from real world inches or cms. More info on the calculator is below.
- Palette – Select the palette you want to start with from the dropdown in this section.
Step 3
When you have filled in the 4 areas listed above, click the Create Project button. The dialog will go away and a new project grid with the options you selected will be created.
Step 4
Set the background color to what you want. Usually, it’s good to pick a color for the background that will be used most, in the picture you plan to draw. To do this:
- Select Background Color – from the background color dropdown just to the left of the color dropper on the top toolbar, select the color you want for the background.
- Clear Grid – to clear the grid with the background color, select the Clear All
 button on the bottom toolbar and pick yes when prompted. This way of clearing the grid resets the project name which is OK in this case, since the project has just been created.
Another way to clear the grid with the background color is to choose Select All from the popup displayed by clicking on the selection down arrow , on the bottom toolbar. Then, click Clear All
 ![]() to clear the area that is selected.
to clear the area that is selected.
Specific Crafts
Now, let’s look at sizing info needed for specific crafts. We’ll also look at how to make a generic grid of square cells or rectangular cells. Use the links below to jump quickly to your own craft if you want to.
- Latch Hook
- Cross Stitch
- Knitting and Crochet
- C2C Crochet
- Generic Grid of Square Cells
- Generic Grid of Rectangular Cells
Latch Hook
When you select the Latch Hook project type, the section for sizing info will show pre-defined options as well as an area to enter your own values.
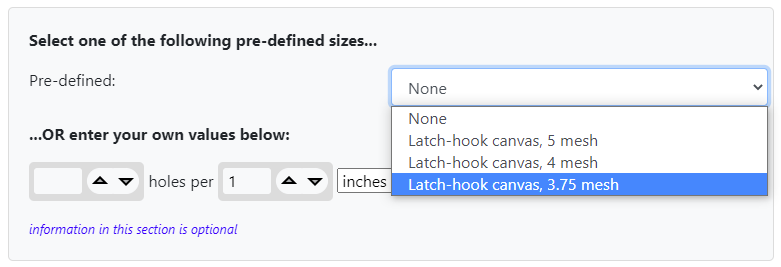
If you select one of the pre-defined options, the values below it will be filled in.
You may also select None and enter your own values. The values are entered in the form of “X number of holes per Y inches/cms”. You can change both the number of holes and the number of inches/cms.
For instance, if you are working with some fabric or canvas-like material and you have determined that there are 10 holes per every 3 inches, you can enter “10 holes per 3 inches”.
Cross Stitch
When you select the Cross Stitch project type, the section for sizing info will show pre-defined options as well as an area to enter your own values.
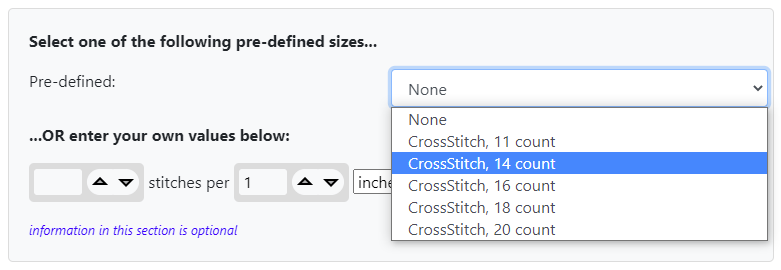
If you select one of the pre-defined options, the values below it will be filled in.
You may also select None and enter your own values. The values are entered in the form of “X number of stitches per Y inches/cms”. You can change both the number of stitches and the number of inches/cms.
For instance, if you are working with some fabric and you have determined that there are 32 stitches per every 2.5 inches, you can enter “32 stitches per 2.5 inches”.
Knitting and Crochet
When you select the Knitting or Crochet project type, the section for sizing info will show pre-defined gauges as well as an area to enter your own gauge.

If you select one of the pre-defined gauges, the values below it will be filled in.
You may also select None and enter your own gauge values for your own sample swatch that you have knitted or crocheted.
In the case of knitting and crochet you MUST provide the sizing info for the program to continue, as it provides the relative height and width of each cell, i.e. the basic shape of the cell is dependent upon the gauge information.
C2C Crochet
When you select the C2C Crochet (Corner-to-Corner) project type, the section for sizing info will show pre-defined options as well as an area to enter your own values.
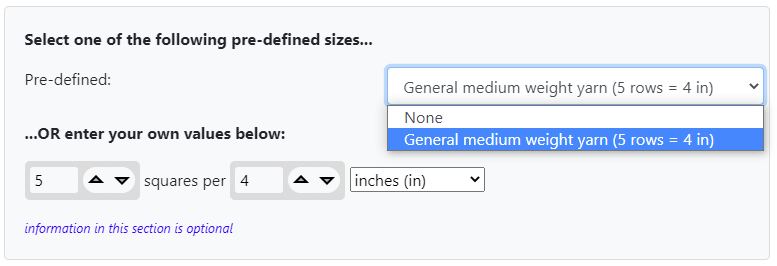
If you select one of the pre-defined options, the values below it will be filled in.
You may also select None and enter your own values for your own sample swatch that you have crocheted. The values are entered in the form “X number of squares per Y inches/cms”. The term “squares” refers to the squares created by 3 double-crochets. Each of those 3-double-crochet squares will be represented in the Grid Designer as a single square cell.
Generic Grid of Square Cells
When you select the Grid of Square Cells project type, the section for sizing info provides an area to enter your own values. This option is intended for other crafts where you know the cells in your grid will be squares.

Enter your values as “X squares per Y inches/cms”.
Generic Grid of Rectangular Cells
When you select the Grid of Rectangular Cells project type, the section for sizing info provides an area to enter your own values. The information needed here is basically equivalent to the information you enter for a knitting or crochet gauge.
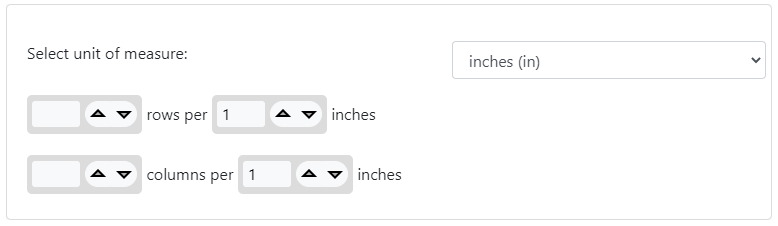
You need to define “X rows per Y inches” and “N columns per M inches”. This will determine the relative height and width of the cells in your grid, as well as their relationship to real world inches/cms.
In the case of rectangular cells you MUST provide the sizing info for the program to continue, as it provides the relative height and width of each cell, i.e. the basic shape of the cell is dependent upon this information.
Calculate Rows and Columns
You can enter in your own values for the number of rows and columns you would like in your grid, but you can also calculate the number of rows and columns from your sizing information.
To calculate the number of rows and columns:
Step 1: Make sure you have filled out the sizing info section of the New Project Layout dialog. Calculation cannot occur without this information.
Step 2: Click the calculator icon above the rows and columns fields in the New Project Layout dialog. The calculator will open.
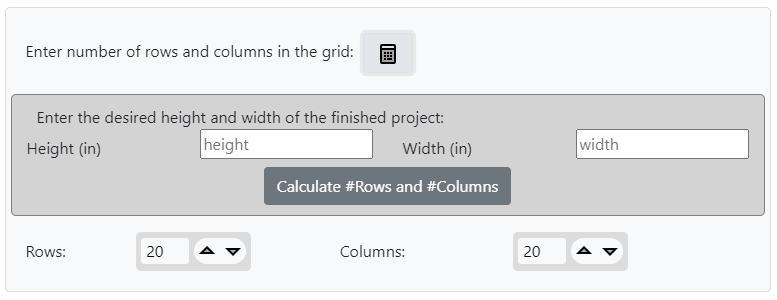
Step 3: Enter the height and width in inches (or cms if you selected that in the sizing info section).
Step 4: Click the “Calculate #Rows and #Columns” button. Rows and columns are calculated and filled into the Rows and Columns field. You can still edit them if you want to change them from the calculated values.
More Info
See Overview – Project Creation in the Grid Designer youTube video for more specific examples. See also the Grid Designer documentation on creating project here.
If you are ready to start the Grid Designer to create your own project, click here.
As always, if you have any questions or comments, leave me a message below or go to my contact page to email me.